
~ สวัสดีผู้อ่านทุกท่าน วันนี้จะมาแนะนำเทคนิคการสื่อสารระหว่าง Server – Client ด้วย Node.js โดยปกติ website ที่ต้องการข้อมูลแบบ real time เช่น messenger หรือ ข้อมูลที่ sensitive ทางฝั่ง server จำเป็นต้องมีช่องทางสื่อสารกับ client อยู่ตลอดเวลานั่นเอง โดยพระเอกของเราในวันนี้ชื่อว่า Socket.io ซึ่งเป็นหนึ่งในตัวเลือกที่ทำความเข้าใจได้ไม่ยาก ผู้อ่านสามารถทำตามทีละขั้นตอน ในบทความนี้ เพื่อความเข้าใจ และประยุกต์ใช้งานได้ทันทีจ้า ~
เริ่มต้นกันที่ให้ทำการสร้างไฟล์ index.js และใส่คำสั่งตามตัวอย่างด้านล่าง
index.js
const http = require('http');
const fs = require("fs");

const hostname = 'localhost';
const port = 3000;

const server = http.createServer((req, res) => {
  fs.readFile("index.html", function(err, data){
    res.writeHead(200, {'Content-Type': 'text/html'});
    res.write(data);
    res.end();
  });
});

server.listen(port, hostname, () => {
  console.log(`Server running at http://${hostname}:${port}/`);
});
📚 ความหมายคำสั่ง : เป็นการสร้าง server เพื่อให้ client เรียกใช้งานผ่านลิงก์ http://localhost:3000
ถัดมาให้สร้างไฟล์ static page ในตัวอย่างเราจะตั้งชื่อไฟล์ว่า index.html
index.html
<!doctype html>
<html lang="en">
  <head>
    <title>Node.js with Socket.io</title>
  </head>
  <body>
    <h1>
      Hello World!
    </h1>
  </body>
</html>
ทดสอบรัน Web Server ไฟล์ index.js โดยใช้คำสั่ง
node index.jsและให้เปิด browser เข้าลิงก์ผ่าน http://localhost:3000 โดยหน้าเว็บจะปรากฏข้อความ Hello World!
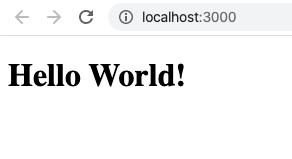
ถึงตรงนี้หากทุกคนขึ้นตามรูปภาพ เริ่มขั้นตอนถัดไปกันได้เลย 🎉 ~ ให้ทำการติดตั้ง package socket.io โดยเราจะติดตั้งแค่ทางฝั่ง server ในส่วน client เราจะเรียกใช้ลิงก์ผ่านทาง cdn แทน
Socket.io for Server
npm install socket.io --saveหลังจากติดตั้ง package socket.io ฝั่ง server เสร็จแล้ว ให้ทำการกลับมาแก้ไขไฟล์ index.js และ index.html อีกครั้ง ตามโค้ดตัวอย่างด้านล่าง
index.js
const http = require("http");
const fs = require("fs");
const io = require("socket.io");
const ioServer = io.listen(4000);

const hostname = "localhost";
const port = 3000;

const server = http.createServer((req, res) => {
  fs.readFile("index.html", function(err, data) {
    res.writeHead(200, { "Content-Type": "text/html" });
    res.write(data);
    res.end();
  });
});

server.listen(port, hostname, () => {
  console.log(`Server running at http://${hostname}:${port}/`);
});

ioServer.on("connection", function(socket) {
  console.log("user connected");
  socket.emit("welcome", `welcome client id #${socket.id}`);
});
index.html
<!DOCTYPE html>
<html lang="en">
  <head>
    <title>Node.js with Socket.io</title>
  </head>
  <body>
    <h1>
      Hello World!
    </h1>
    <script src="https://cdnjs.cloudflare.com/ajax/libs/socket.io/2.3.0/socket.io.js"></script>
    <script>
      let socket = io.connect("http://localhost:4000", { reconnect: true });

      socket.on("connect", function(socket) {
        console.log(">>> client socket connected");
      });

      socket.on("welcome", function(data) {
        console.log(data);
      });
    </script>
  </body>
</html>
และทำการรันไฟล์ index.js ใหม่อีกครั้ง เพื่อดูผลลัพธ์
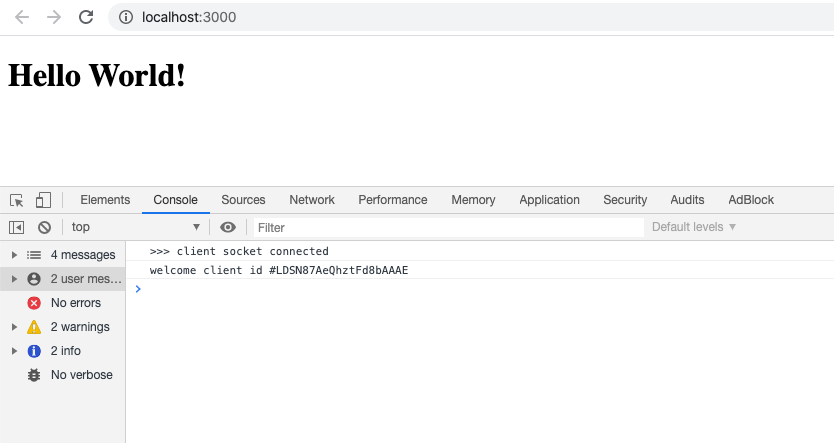
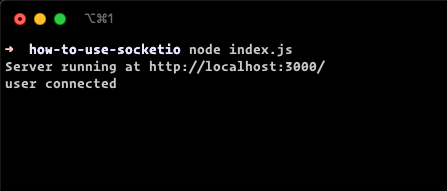
node index.jsClient Result
Server Result
เพียงเท่านี้ Server ก็สามารถสื่อสารกับ Client ได้แล้ว โดยในตัวอย่างจะเป็นการให้ Server ส่งข้อความไปบอก Client ว่าเลขประจำตัว Client คืออะไร
คำถาม : หาก Client ต้องการส่งข้อความไปยัง Server จะทำยังไงนะ 🤔
ทำได้โดยใช้คำสั่ง socket.emit ในตัวอย่างเราจะไว้ด้านล่าง console.log ที่ Server ส่งมาบอก Client ID หลังจากนั้นจะส่งข้อความกลับไปยัง Server ผ่าน Topic “ready”
index.html
socket.on("welcome", function(data) {
  console.log(data);
  socket.emit("ready", "this is after welcome message.");
});
และในส่วน Server หรือไฟล์ index.js เราจะเพิ่ม Socket Listen ผ่าน Topic “ready”
index.js
ioServer.on("connection", function(socket) {
  console.log("user connected");
  socket.emit("welcome", `welcome client id #${socket.id}`);

  socket.on("ready", function(data) { // This is listen socket from topic ready.
    console.log(data);
  });
});
ผลลัพธ์การส่งข้อความจาก Client ไปยัง Server

🌟~ เป็นยังไงกันบ้าง การใช้ Socket.io ไม่ได้ยากอย่างที่คิดกันเลยใช่มั้ย หวังว่าบทความนี้จะเป็นประโยชน์แก่ผู้หลงเข้ามาอ่านทุกท่าน ไว้เจอกันบทความหน้าจ้า ~